simple-uploader is a tool for easily uploading files and sharing links via AWS S3. The user enters their bucket name and credentials, then they can easily drop in files to be uploaded and are given a link to share that file with others. They can also delete files that they have uploaded from that device.
Installers for Windows, macOS, and Linux can be found in our Releases.
Note: The Linux installer is an AppImage. In order to use an AppImage file, the user will first need to set the installer file (e.g. simple-s3-uploader-0.2.0-x86_64.AppImage) to allow execution as an application. Then, when they run it the application will be installed and opened.
If the user downloads and installs using our installers, the application will be automatically updated quietyly in the background as they use it in order to keep it up to date and provide them with the latest features.
When a user runs the application for the first time, they need to enter their AWS credentials.
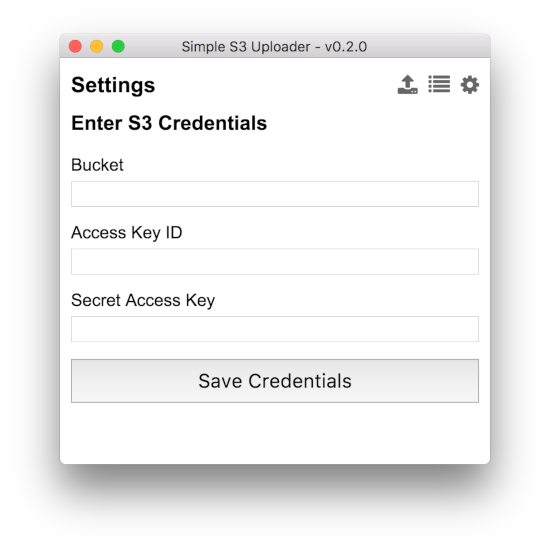
After their credentials have been entered, the user will see the upload screen where they can drop files to have them uploaded to S3. When the upload is complete, a link to the file will be displayed on the screen and copied to the user's clipboard. If there are any problems with the upload, an error message will be displayed on screen and then the user will be redirected to the settings screen in case they need to enter a new set of credentials.

All uploads from a device are stored locally for future reference. The user can enter the list screen to see all of their uploads and either re-copy the link or delete the file from S3.
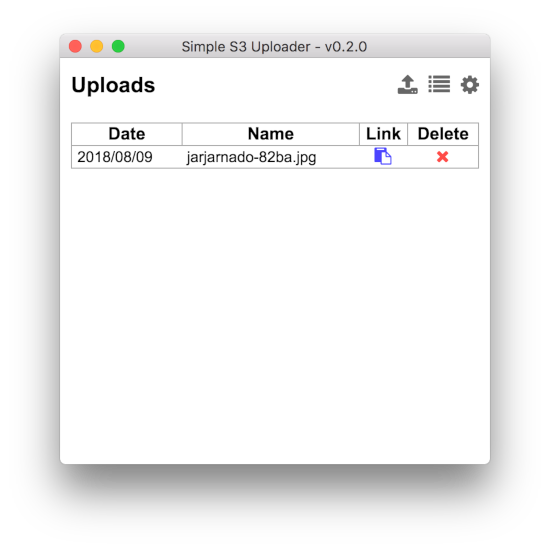
All files uploaded automatically have their names appended with four random characters in order to reduce or eliminate the risk of overwriting a file already in S3.
Once you have created an account with AWS and logged in, select Services from the top menubar and then S3 under the Storage category. Click the + Create bucket button. Enter a Bucket name (e.g. com.my-domain.fileuploads) and Region (probably just select the one nearest geographically to you), then click Next. Unless you specifically have have need to change them, you can just leave the Versioning, Tags, Logging, and Encryption settings at their defaults and click Next. As with the previous view, you should be able to leave the permissions settings at their default. The owner will have permission to read and write to the bucket and the public will not have read or write access to the bucket. That is what you want. Click Next and then Create bucket. In your list of buckets, you will see your bucket. The Bucket name is what you want to enter into the Bucket input in the Simple S3 Uploader Settings.
Once you have created your AWS account and S3 Bucket, got to Service and select IAM under the Security, Identity & Compliance category. Select Groups from the menu on the left. Click Create New Group. Enter a descriptive name like FilesharingLimited and click Next Step. If you wanted to grant unlimited S3 permissions to the group, you could select AmazonS3FullAccess from the list. But, it is much safer to only give users the permissions that they need. So, do not attach any policies and instead click Next Step and then Create Group. From the list of groups, select your newly-created group. Click on Inline Policies to expand it and click the link to create a new policy. Select Custom Policy and then click Select. Under Policy Name give it a simple name like 'custom' and under Policy Document paste in the following:
{
  "Version": "2012-10-17",
  "Statement": [
    {
      "Effect": "Allow",
      "Action": [
        "s3:PutObject",
        "s3:PutObjectAcl",
        "s3:DeleteObject"
      ],
      "Resource": [
        "arn:aws:s3:::[bucket-name]/*"
      ]
    }
  ]
}
Replace [bucket-name] with the name of your S3 Bucket (e.g. com.my-domain.fileuploads). Click Validate Policy to make sure that the policy is valid and then click Apply Policy. You will now see your custom policy under Inline Policies. Select Users from the menu on the left. Click Add user. This is where you will add users who will be able to use the file uploader. If you want everyone to share the same user credentials, you can only enter one user. Or, you can enter individual users. Afters entering the desired username(s), select Programmatic access under Access type. Click Next: Permissions. You will see a list of groups. Select the group that you just created a moment ago and then click Next: Review. If everything looks correct, click Create user. Click the Download .csv button to download the credentials. This will be the only time that you can see the secret access key from the AWS website, so you must save them before closing the window. Click Close and you are done setting up AWS! Now, enter and save your Access Key Id and Secret Access Key into Simple S3 Uploader and you are ready to go!
- Clone the repository
- Run
npm installfrom the project's root directory - Run
npm startto open the application
Contributions are welcome! If you have any issues and/or contributions you would like to make, feel free to file an issue and/or issue a pull reuqest.
Apache License Version 2.0
Copyright (c) 2018 by Ryan Burgett.